When it comes to backpacking, no one knows absolutely everything. Those who are just starting will quickly learn the best backpacking tips and tricks from the moment they step on the trail.
These insightful hacks stem from extensive experiences in the woods, where countless mistakes were made. The lessons learned from those errors, as well as the weighty loads borne in the past, now contribute to making your life considerably easier.
On my first backpacking trip, I was an absolute mess. My pack weighed nearly 60 pounds, my gear was everywhere, and I was always the last to pack up. Over time, the systems that work for me have become routine. Every time I pack up and get ready to head out, I know exactly what goes where and what to leave at home.
The best backpacking hacks will make your life so much better on the trail. From trying out lightweight gear to slicing off your backpack straps and hoarding condiment packets for the next trip, making life more comfortable is hard, but valuable.
These are just a few of the backpacking tips and tricks that have been picked up over the years by everyone on the trail. Try some of these out and add them to your own toolbox to make life on the trail a little bit easier.
What Is and Isn’t Worth the Weight
Talk to anyone and you’ll hear tips about cutting weight when it comes to backpacking. Everything comes down to shedding an ounce of weight here and another ounce there in ultralight backpacking. While it can become extreme, the extra weight lost will add up quickly and you can truly feel the difference as the miles stack.
That being said, leaving everything at home isn’t the answer either. There are certain bits and bobs that are well worth bringing along, even if it means a heavier pack. Some people are sworn ultralighters and will refuse to bring anything that isn’t 100% necessary.
While being ultralight isn’t our goal here, getting down to just lightweight status is worth our time and effort. Check out our Backpacking Base Weight Guide to have an idea of how much your bag should weigh with all your non-consumable gear.
What’s worth it to you is something that you have to determine for yourself, but the following suggestions are where I’ve found it easy to shed weight and where it’s okay to put on a couple more ounces.
1. Cut your Backpack Straps
One of the biggest practices in the backpacking game is to cut weight by literally cutting gear. Backpack straps are often far too long for what you need and you can shed a few ounces right out of the gate by trimming those straps down.
Obviously, you’ll need to keep them long enough to adjust slightly while hiking, but when there are so many different straps, you can trim them down quickly before heading out.
2. Trade out Nalgenes for Smart Water Bottles
A 1L Nalgene bottle weighs around 6.1 ounces and costs around $10, depending on where you buy it. A Smart Water bottle on the other hand weighs in at 1.2 ounces and will only cost a couple of dollars at the closest gas station.
Many different backpacking brands and pieces of gear work perfectly with a Smart Water bottle. For example, the well-loved Sawyer Squeeze filter will screw directly onto the bottle, unlike with a Nalgene. Not only will switching your bottles over save a lot of weight, but it will also save money and provide convenience on the trail.
3. Save your Feet with Camp Shoes
One of the best ways to actually add weight to your pack is to bring along a pair of camp shoes. Nothing is better than slipping out of your hiking boots at the end of the day and into a comfortable pair of shoes that let your feet breathe and rest when you aren’t hiking.
Crocs tend to be one of the best picks for camp shoes because they are ultra-lightweight and breathable. They’re cheap, easy to find, and will last for many years.
Backpacking Hacks on When to Save and When to Spend

Cutting down on weight can be easy when you can spend a small fortune on all of the lightweight gear you want. There are certain instances where it’s worth spending that money, but there are also several pieces of gear that will cost a bit more but aren’t worth the price tag.
4. If You Can, Buy Lightweight Gear
As mentioned, ultralight backpacking gear can be incredibly pricey. If you can do so, buying some lightweight gear is well worth the price.
In general, there are three main items that you can shed a lot of weight by buying ultralight.
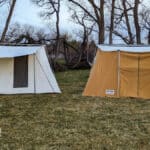
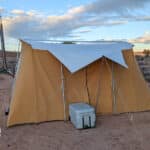
Tent: A tent is likely the heaviest item (other than food) you’ll carry. With a lightweight backpacking tent, you can shave multiple pounds. Keep an eye out for tents that utilize hiking poles that you already have. Your hiking poles can become tent poles for some great tents. This can make a massive difference in the long run.
Sleeping Bag: Dependent upon the weather, going lightweight on a sleeping bag is a great move. Down bags pack down to almost nothing and weigh significantly less than synthetics. Big Agnes even makes sleeping bags that don’t have insulation on the bottom portion and instead have a sleeve for your sleeping pad.
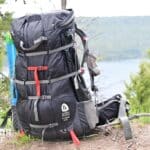
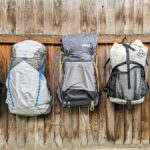
Backpack: A big backpack is often heavy and clunky. While a heavier, clunkier pack is more durable, the best ultralight backpack can cut pounds off your entire setup.
5. Don’t Waste Money on a Titanium Spoon
While buying ultralight with the big three items, the little stuff can be unnecessary. Many ultralight hikers will argue this point, but the cost to weight ratio of small pieces of gear like a titanium spoon doesn’t work out in your favor.
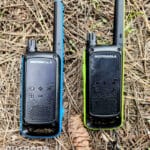
6. Choose Maps over GPS
Modern-day GPS systems likely save lives almost every day. That being said, they cost a ton of money to buy initially and to keep a subscription for.
Maps are now considered old school but are debatably better for navigation in the backcountry. If you know how to use a map properly, you can find your location and never have to worry about running out of battery. Learning how to use a map and compass is generally considered one of the biggest safety points while backpacking.
Once I learned how to use a map and compass, I not only felt far more competent and confident in the backcountry, but I felt that GPS devices were no longer necessary. I was able to sell my GPS and have yet to get (really) lost.
Backpacking Ideas on How to Care for Your Gear
Part of being out in the woods is ensuring you take care of your gear so you can stay there for a long time without issue. This requires close attention to detail and knowing how to fix things when they inevitably break.
Taking good care of your gear doesn’t mean you must carry multiple sleeping bags or more than one pair of good pants. It just means taking preventative measures rather than letting the elements and heavy use destroy everything.
7. Pack a Spares and Repairs Kit
My spares and repairs kit for backpacking is quite small. Each item will add weight and space, so I am incredibly picky about what to bring. The things that have always made it into my spares and repairs kit are:
- Sewing needle with 50 feet of heavy-duty thread
- Spare lighter with duct tape wrapped around it
- Single spare large buckle
- Sleeping pad patch kit
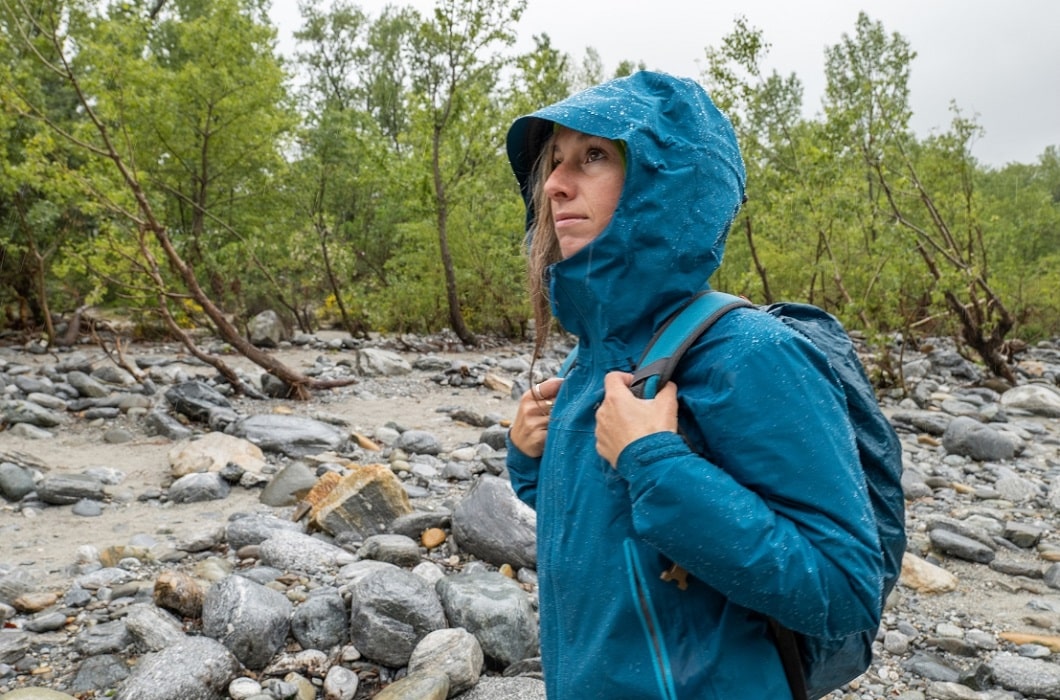
8. Keeping Dry
Getting wet on the trail can be dangerous, not to mention absolutely miserable. Wet clothes and gear can lead to hypothermia in higher temperatures, rashes and blisters, and severe discomfort. When gear gets wet, it can be difficult to dry it out, so it’s imperative that you keep dry from the get-go.
The best way to stay dry is to have a solid layering system with an exterior waterproof shell and moisture-wicking base layers that can be easily removed to prevent too much sweating. In addition to keeping yourself dry, use a pack cover to keep your bag as dry as possible.
I will always line the interior of my backpack with a thick garbage bag to take care of any heavy downpours or overnight surprise floods. If the outside of my bag gets wet, that’s okay. It only becomes a problem when everything inside is wet.
Even with the liner, everything inside the backpack goes into its little dry bag. This may be overdoing it, but I always sleep in a dry sleeping bag.
9. Bring a Butt Pad
The most important piece of gear you need to take care of is your body. It’s doing all the heavy lifting and hard work. Keeping comfortable when sitting on uneven and rocky terrain for days on end is hard to do.
Bringing a butt pad along for the ride is a multi-faceted backpacking trick. It keeps you comfortable and warm and can save your pants from getting ripped by sharp rocks you didn’t see coming.
This can just be a small chunk of an old closed-cell foam pad that you may have used before getting an inflatable sleeping pad, but they also sell small pads made specifically for this use.
How to Eat Like a King or Queen
Anyone that’s ever been backpacking knows that one of the best moments of the day is finally sitting down to eat dinner after walking all day. A lot of the time, I can eat just about anything and be grateful for it, but having a nice meal is one of those things that you thank yourself for after a long day on the trail.
10. Try it Out Beforehand
You can always go with the premade dehydrated backpacking meals, but the cost adds up fast, and in my opinion, homemade food can be just as good.
Try out some meals and different ideas at home in the kitchen. You can recognize that it won’t be as well-made in the backcountry, but it will give you a good idea of what’s possible.
You should try your meals beforehand, and you can easily repackage them and throw spices into the Ziploc baggy with the rice and beans, or whatever it is you’re eating. This will make the cooking much easier when you arrive at camp and want to eat as quickly as possible.
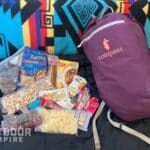
11. Collect Condiment Packets
Every time you swoop through the grocery store or a restaurant with packets of ketchup, mayonnaise, salt, or pepper, grab a few and bring them along backpacking. They don’t weigh much, but they can make a drastic difference when you throw them on the same meal you’ve eaten for the past few nights.
12. Food Cozy
A backpacking pot cozy is one of the most brilliant backpacking hacks out there. This insulating sleeve helps save fuel and keep food warm, making a great insulating barrier between your hand and your morning’s hot coffee.
When you’re on the trail, saving fuel by using a cozy can mean that you carry less fuel between resupplies. This is a great way to save both money and weight that you must carry daily.
13. Electrolytes and Fats
Many people will eat high-sugar foods that provide a short burst of energy when exercising, and think the same applies to backpacking. In reality, backpacking is all about playing the long game. Fats are a rule of thumb for making good backpacking meals.
Fatty foods provide nutrition that burns slower in your body over long periods. While fats are essential, you must also pay attention to the sugars and electrolytes you’re packing.
Sugar is in almost everything these days, so that isn’t too hard. Electrolytes, or salty foods, can also be pretty easy to find. You can ensure that you have enough by simply bringing along electrolyte packets for your water that will likely have salts and sugars.
14. Always Bring More
No matter how much you think you’ll eat, you’ll probably want to eat more. A good backpacking calorie calculator is a great way to determine how many calories you need per day, but bringing more than you think you’ll need is always a good idea.
The reason for this is two-fold. First, you’ll probably be hungrier than you think and will love yourself for packing a few extra Snickers bars.
Second, if something goes wrong in the backcountry, you may find that you’re stuck out for an extra day before making it to town where you can get more food. Having a thousand, or even two thousand, extra calories is always a good move worth its weight in gold.